Insurance Payers

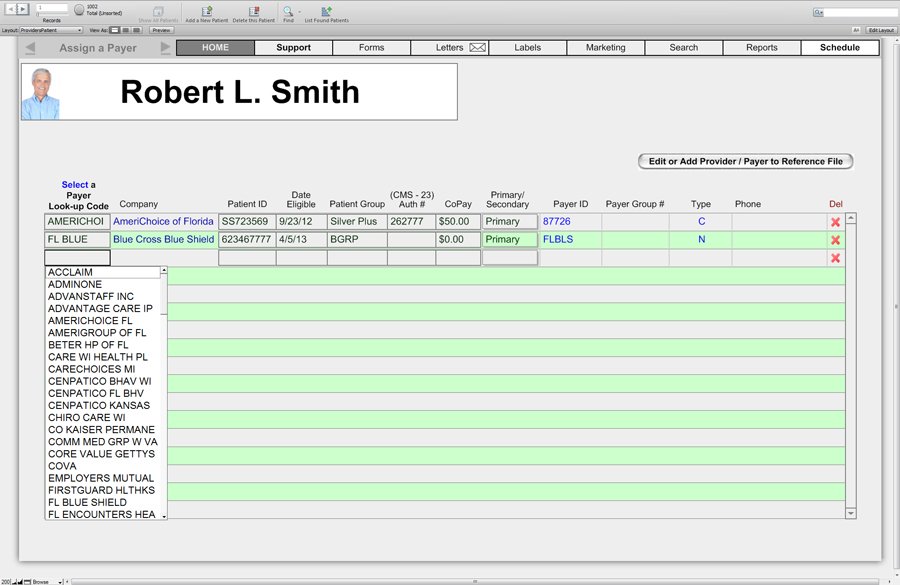
- Each patient can have one or more providers assigned to them. These providers are assigned from a list of providers that were set-up in the Provider Reference table.
- To assign a Provider to a given patient, click into the first field titled “Provider Code.”
- Choose a Provider code from the drop-down list. You should not try to assign a Provider to a patient through any other method.
- The only editable fields on this screen are the “Patient ID”, “Date Eligible”, “Patient Group #”, “Authorization #”, “CoPay” and “Primary/Secondary” fields. The highest ranked providers will automatically be inserted to a HCFA form at the time it is created.
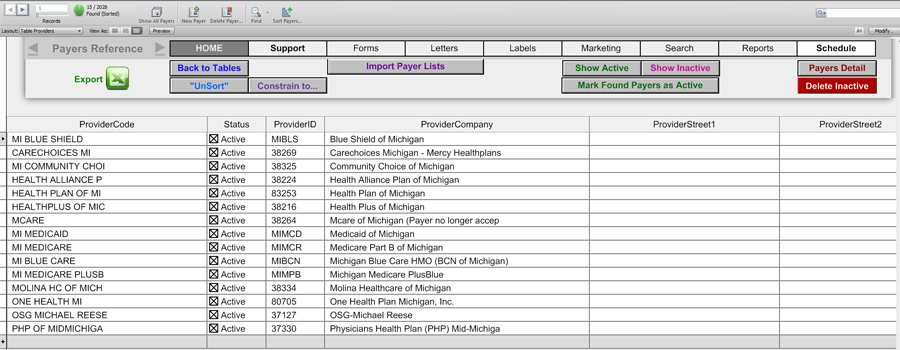
Here are the Payers displayed in a list view for easier muti-payer viewing:

If there are more than one Provider / Payer, each can be ranked in order of priority by selecting from the drop down menu under “Primary / Secondary.” This will cause the list to automatically re-sort, in the chosen order.

Payer/Provider Set-Up
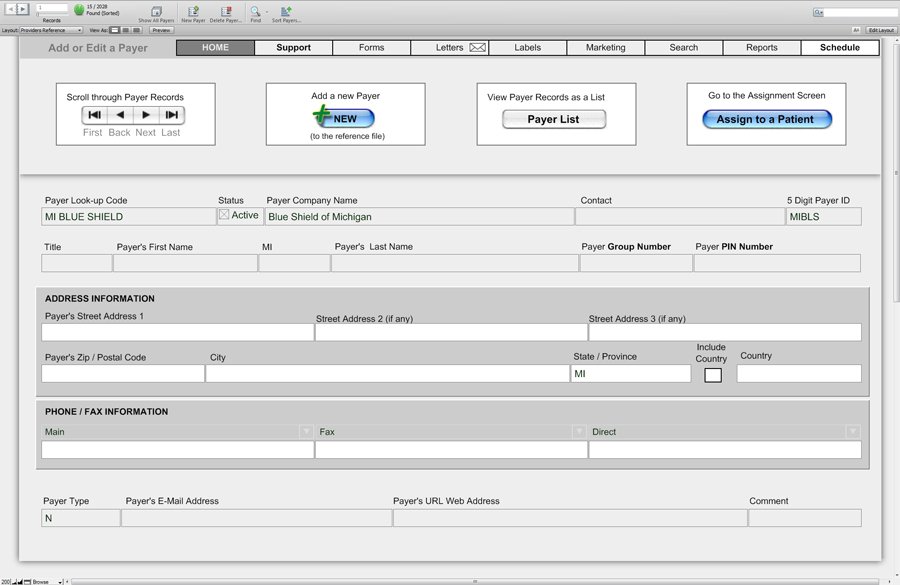
- From the Scripts menu, select Payer/Provider Set-up. This will open a new window for the Provider’s Reference File.
- To save time, we have included a button that will allow you to quickly import a pre-defined payer list from ENSHealth. That list contains payer IDs required for electronic billing. The list does not contain mailing address information. (An address is not required for electronic claims, but may be helpful for printed CMS-1500 forms You can add the address information as needed.)
- The “Look-up Code” can be any description of your choosing. Obviously, you’ll want the code to be easily recognizable.
- Each Payer/Provider that is added must have a unique ID (Look-up Code.)
- You can browse through the Payers listing by using the arrows located on the top left and top right sides of the screen.
- To add a new Payer to the reference file, click the NEW button. Add information, as desired. (Remember, each new payer must have its own unique Look-up Code.)
- To delete a record from this section, click in the “Look-up Code” field, then move your mouse to the “Records” drop down menu and choose “Delete.” An alternate method is to press Ctrl + E. Please use caution when deleting a record because the deletion is permanent and the record is irretrievable.
- To make the payers/providers that you use most often more easily accessible, simply insert a space in front of the payers Look-up Code and those names will appear first on the patient assignment list.
- To view your payers as a list, click the “View Prov/Payer List” button at the top of the screen.
- The Payer reference list view allows you to see multiple payers at once. You can sort this list by any field. Simply click into the desired field on any row. From the right-click menu, select Sort Ascending (or Descending.)
- You can also search for information in any field using the HearForm FIND process. (See the FIND section of this user manual for details.)
- For example: If you’d like to find all references to Florida in the ENSHealth list you previously imported, you can search the Provider Company field for the word “Florida.” Then place a space in front of each Provider Code to force those names to the top of the list (on the patient payer assignment screen – not this screen or the reference screen.)
- When you are finished viewing the Payer list screen, you can either go to the overview screen (Home Button) or navigate back to the Payer Reference detail screen.
- From the detail screen, click the “Go to Patient Provider/Payer” button to navigate to the Patient Payer Assignment Screen. That’s the screen that you’ll use later to assign one or more insurance companies to any desired patients.
- By assigning an insurance company to a patient, you’ll save time while filling out HCFA forms. The assignment process will be explained in the Provider/Payer Patient section of the user manual.
